In this guide
How to Install a Pressure Washer Hose Reel: A Step-by-Step Guide
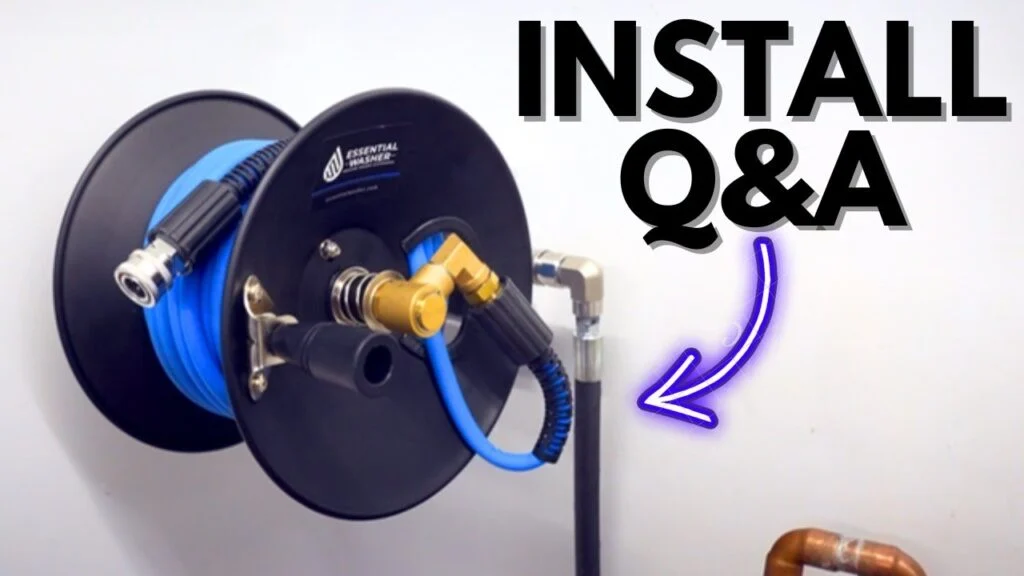
A pressure washer hose reel is designed to store your high-pressure hose neatly, prevent tangles, and help extend the life of the hose. Most reels include a drum or spool to wind the hose around, a handle for winding and unwinding, and a mounting bracket for attaching the reel to a fixed surface. Some reels are wall-mounted, while others are floor-mounted or portable. The installation method you use depends on the type of reel you have and where you plan to mount it. [5]
The exact steps for your model may differ from another brand or kit. Always read the manufacturer’s instructions for your specific hose reel before you begin. This guide covers the general process, including unpacking, mounting, connecting hoses, and testing for leaks. [1]
What You Need Before You Start
First, decide where you want to mount the reel. A hose reel can be mounted anywhere that is convenient and sturdy, whether that is the pressure washer itself, a cart, a wall, or another suitable surface. Some reels use a universal mount and can be installed on a wall or a base. Other reels are designed specifically for wall mounting or for portable use. [1][2]
Before you drill any holes, identify what kind of reel you have. Some pressure washer hose reels ship fully assembled. Others are sold as kits that require you to install fittings and connect hoses yourself. If your reel ships fully assembled, you can usually go straight to the mounting and hose-connection steps. If it is a kit, you may need to identify each component before you start. [2][6]
Step 1: Unpack and Inspect Components
Open the packaging and lay out all parts and accessories. Check every piece against the enclosed inventory list to confirm that nothing is missing or damaged. Starting with all necessary components in good condition helps you avoid problems during installation. [1]
For example, one pressure washer hose reel kit includes a hose reel, 5/16-inch bolts, 5/16-inch nyloc nuts, elbow fittings, a 68-inch jumper hose, loop clamps, and bracket hardware. Your kit may include different hardware and accessories. Package contents can change, so verify the current manufacturer or retailer listing for your specific model if you are not certain what should be in the box. [6]
Step 2: Choose the Mounting Location and Method
Hose reels can be mounted to concrete, wood wall studs, or other sturdy surfaces. If you are installing a wall-mounted reel, the basic method is to mark the drill points, insert anchors, and secure the reel with screws. If you are mounting into wall studs or concrete, use the anchor method that matches your wall type. [3][4]
For a bracket-mounted reel, place the bracket against the intended location and use a marker to mark the drilling points. Drill the holes at the marked points, then align the bracket with the holes and secure it with screws. After the bracket is in place, lift the hose reel and align it with the bracket according to the manufacturer’s instructions. Use the provided bolts or screws to secure the reel to the bracket. [1]
Make sure the reel is securely fastened. A loose reel can move while you are operating the pressure washer, which can cause accidents. If your reel has a swivel feature, test that it rotates in the direction you need before you fully tighten everything. Some reels can swivel 180 degrees, while others can pivot a full 360 degrees and include a lock pin to set the rotation where you want it. [1][2]
Step 3: Install the Reel Securely
If your reel uses a mounting bracket, attach the bracket to the mounting surface first. Use the correct fasteners for your surface. For a wall-mounted reel, mark drill points, insert anchors, and secure the reel with screws. For a kit that includes bolts and nuts, you may need two wrenches to hold the fasteners while you tighten them. In one kit, for example, the hose reel is secured to a mounting plate with 5/16-inch bolts and nuts using two 1/2-inch wrenches. [3][6]
Once the bracket is secure, lift the reel into position and align it with the bracket. Use the supplied bolts or screws to fasten the reel to the bracket. Tighten all fasteners firmly. The reel should not wobble or shift when you pull on the hose. [1]
Suggested read: How You Too Can Benefit From These wall mounted pressure washer Methods
Step 4: Connect the Fittings and Hoses
There are two main connections to make: the water inlet side and the high-pressure discharge side. The exact fittings will depend on your reel and pressure washer, but the principle is the same.
Connect the Inlet Side
To connect the pressure washer hose to the reel, you may need to attach a garden hose adapter to the end of the hose. Apply Teflon tape to the threaded end of the adapter to ensure a tight seal. Wrap the tape clockwise around the threads so that it covers the entire surface. [1]
Next, locate the inlet fitting on the side or bottom of the hose reel. Insert the adapter into the fitting and tighten the hose clockwise. Use a wrench to make sure the connection is tight. Be careful not to over-tighten, because you can break the threads. If the manufacturer recommends thread tape, use it to prevent leaks. [1]
Connect the High-Pressure Discharge Side
Some reel kits use elbow fittings on the high-pressure side. In one kit, two 3/8-inch female pipe thread elbows are attached to the reel and the machine with a 7/8-inch wrench. The orientation of these elbows matters, so follow your manual’s diagram closely. [6]
If your kit includes a jumper hose, connect the non-swiveling end of the hose to the elbow fitting on the reel. Then connect the swiveling end of the hose to the elbow fitting installed on the high-pressure outlet of the pressure washer. Some kits also use loop clamps to hold the jumper hose in place along the frame. [6]
If your reel has a quick-connect nipple, the high-pressure hose that came with the unit can be connected to the nipple and then wound onto the reel. Wind the hose onto the drum in even layers so that it coils smoothly and does not kink. [6]
Step 5: Test the Installation
After all connections are made, test the installation before using it at full pressure.
– Check for leaks at every connection. Turn on the water supply and inspect the inlet, outlet, and any elbows or adapters. If you see moisture, tighten the fitting slightly. Do not force it.
– Test the reel operation. Reel the hose onto the drum with the handle and set the lock pin if your reel has one.
– Test the swivel function. If your reel is designed to swivel, make sure it moves freely and that the lock pin holds the reel in place when needed. [1][2]
If the reel is mounted on the pressure washer itself, double-check that the reel is still tight after pulling the hose.
Verify Your Reel Ratings and Accessories
Pressure washer hose reels are not all the same. Some reels are rated for specific hose capacities, pressures, and temperatures. For example, some reels are rated for 5000 psi and 400°F. Before you use a reel with a high-pressure or high-temperature machine, confirm that the reel’s rating matches your pressure washer’s output. [2]
Also verify whether your reel includes extras such as a gun holster, handle crank, or accessory organization system. Some wall-mount systems include additional steps for mounting a gun holster and organizing accessories. If your kit includes those parts, follow the specific instructions for them. [4]
Prices, stock, discounts, ratings, availability, package contents, and accessories can all change. Before buying or relying on a reel, check the current manufacturer or retailer listing for your exact model. The manual that comes with your reel is the final authority for mounting hardware, torque, hose routing, and pressure ratings.
Final Installation Checks
Before you call the installation complete, take a few minutes to confirm that:
– The reel is firmly mounted to the wall, base, cart, or pressure washer.
– The mounting bracket screws are tight and the reel cannot move under load.
– The Teflon tape is wrapped in the correct direction and the inlet adapter is sealed.
– The high-pressure hose is connected properly and any jumper hose is secured with clamps.
– The reel rotates and locks correctly, if your model has a lock pin.
– There are no leaks at any connection. [1][6]
A properly installed pressure washer hose reel keeps your workspace safer and your hose more organized. Take your time, use the right hardware for your mounting surface, and follow the specific instructions for your model.
Suggested read: How Long Does A Washer Take: Complete Beginner Guide
Sources
[1] https://www.bisonclean.com/how-to-install-a-pressure-washer-hose-reel
[2] https://www.hydrotek.us/inventory/hose-reels
[3] https://www.jbtools.com/blog/how-to-install-a-pressure-washer-hose-reel
[4] https://activeproducts.com/blogs/news/how-to-install-a-hose-reel-wall-mount-system
[5] https://powerwash.com/power-wash-basics/the-ultimate-guide-to-a-pressure-washer-hose-reel
[6] https://assets.northerntool.com/products/157/documents/manuals/1571711.pdf